
Installing PostgreSQL On GCP VM For Free
Running PostgreSQL on your own virtual machine in the cloud gives you more control, flexibility, and real-world experience than a managed solution. And the best part? You can do it completely free on the Google Cloud Platform (GCP) Free Tier. In this guide, we’ll walk through how to deploy a free VM, install PostgreSQL, secure it, and connect to it from your local machine.
Creating a Free VM in GCP
First, head over to: https://cloud.google.com/free Google offers an E2-micro VM as part of their forever-free tier. This is perfect for learning, practicing SQL, or running lightweight applications.
Create A New Project
- Log in to your Google Cloud Console.
- Click on the project dropdown at the top and select "New Project".
- Name your project and click "Create".
Create A New VM
Navigate to Compute Engine > VM Instances and click "Create Instance". Configure your VM with the following settings:
| Setting | Value |
|---|---|
| Name | postgres-vm |
| Region | us-central1 or us-east1 (Free-Tier Eligible) |
| Machine Type | e2-micro (Free Tier) |
| OS | Any Debian OS |
| Disk Type | Standard Persistent Disk |
| Disk Size | 10GB Standard is enough |
| Data Protection | No Backups |
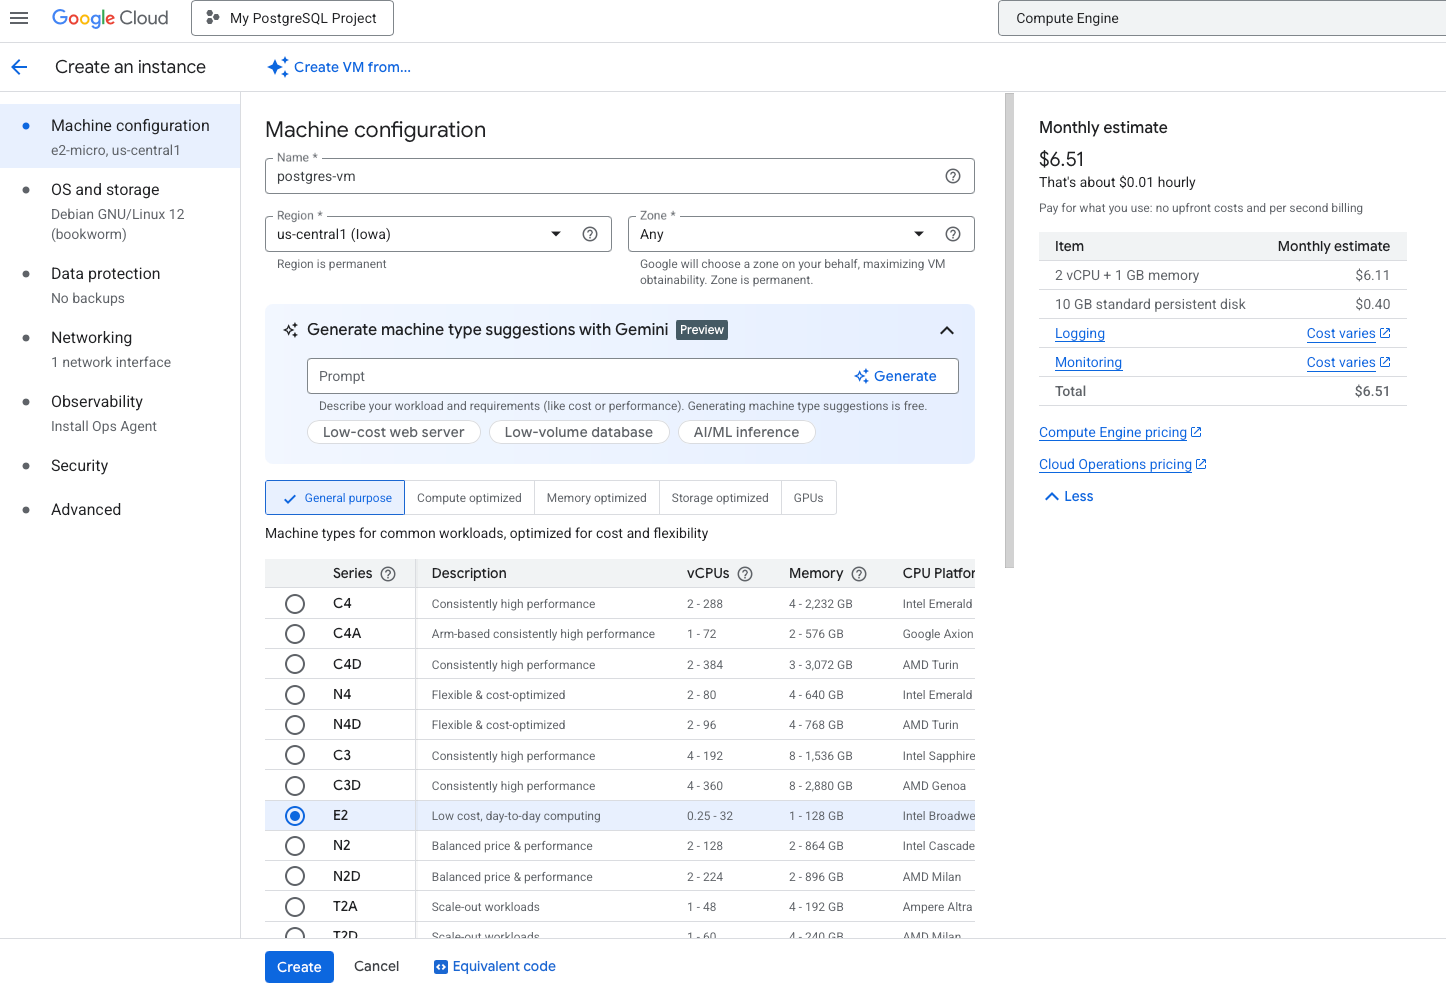
You will see the estimated cost but you can ignore it. This will register as Free Tier and cost nothing. Just be sure the settings match what is described above. Click "Create" to launch your VM. It may take a few minutes for the instance to be ready.
Connecting To Your VM
Once your VM is running, you can connect to it via SSH directly from the GCP Console by clicking the "SSH" button next to your instance.
Once connected run the following. You should see your username returned and this shows you are successfully connected.
whoami
Good, let's start by updating the system. We also need to add the PostgreSQL APT repo.
sudo apt install curl ca-certificates
sudo install -d /usr/share/postgresql-common/pgdg
sudo curl -o /usr/share/postgresql-common/pgdg/apt.postgresql.org.asc \
  https://www.postgresql.org/media/keys/ACCC4CF8.asc
. /etc/os-release
sudo sh -c "echo 'deb [signed-by=/usr/share/postgresql-common/pgdg/apt.postgresql.org.asc] \
  https://apt.postgresql.org/pub/repos/apt $VERSION_CODENAME-pgdg main' \
  > /etc/apt/sources.list.d/pgdg.list"
Now we can install PostgreSQL.
sudo apt update
sudo apt install postgresql-18 postgresql-client-18
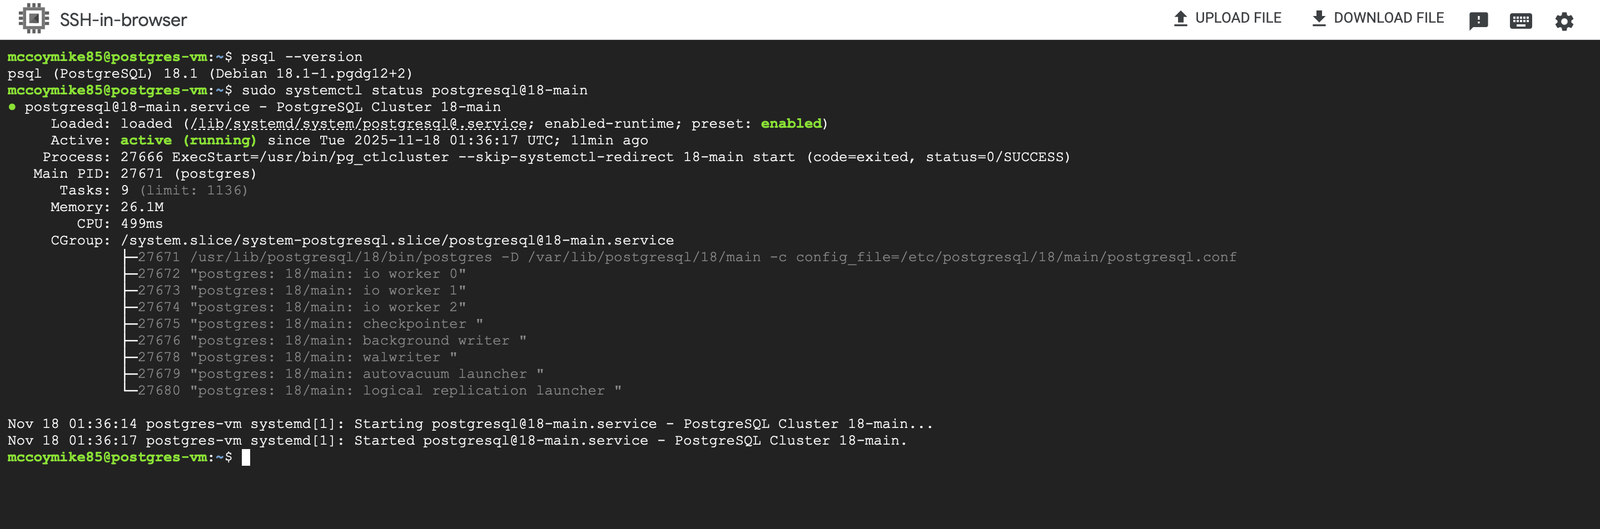
Verify PostgreSQL is installed and running.
psql --version
Configuring PostgreSQL
By default, PostgreSQL uses "peer" authentication for local connections. This means it checks if the PostgreSQL username matches the system username. We need to set a password for the "postgres" user and change the authentication method to "md5" to allow password-based authentication.
sudo -i -u postgres
psql
Run the following to alter the password for the "postgres" user.
ALTER USER postgres WITH PASSWORD 'mysecretpassword';
\q
exit
Out of the box, PostgreSQL only accepts local connections. If you want to connect using DBeaver or pgAdmin from your computer, you’ll need to change two files. First, open postgresql.conf so PostgreSQL can listen for external connections.
sudo vi /etc/postgresql/18/main/postgresql.conf
Find the line that starts with listen_addresses and change it to:
listen_addresses = '*'
Next, edit pg_hba.conf to allow connections only from your personal IP address. ⚠️ Important: Never allow 0.0.0.0/0 access to PostgreSQL. This exposes your database to the entire internet and will result in compromise.
sudo vi /etc/postgresql/18/main/pg_hba.conf
Add this line, replacing YOUR_PUBLIC_IP with your actual home IP:
host all all YOUR_PUBLIC_IP/32 md5
To find your public IP you can grab it from a site like https://whatismyipaddress.com.
Restart PostgreSQL to apply the changes.
sudo systemctl restart postgresql
Creating a Secure Firewall Rule
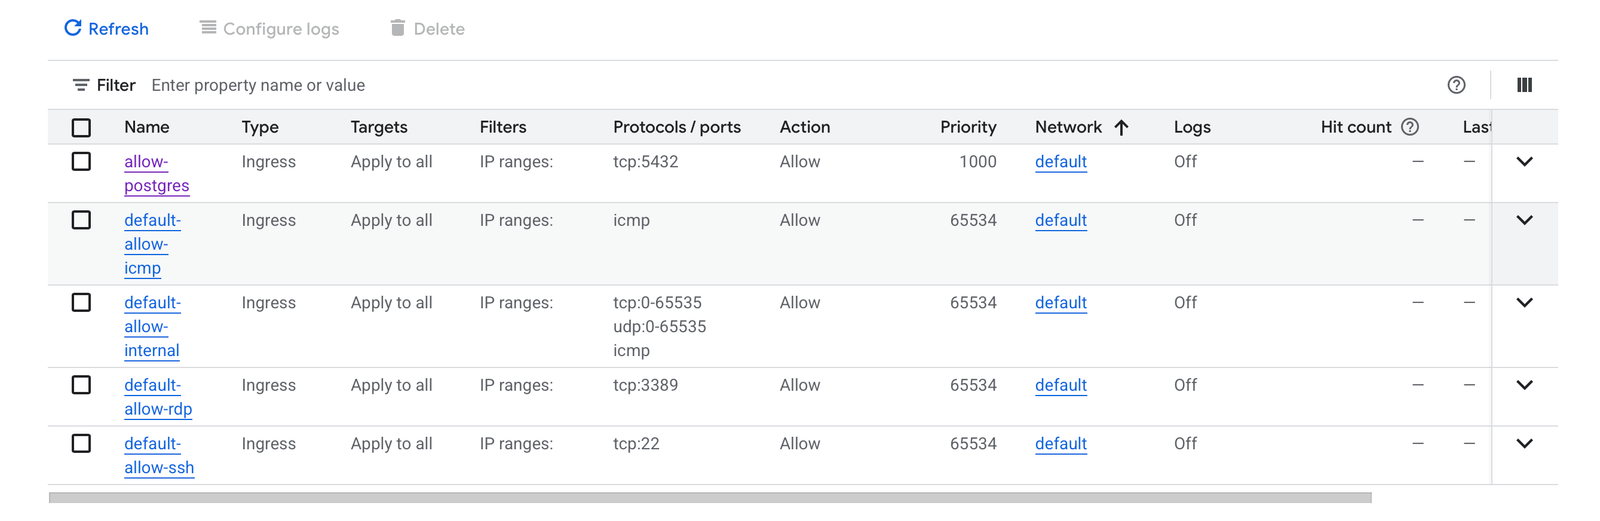
By default, GCP blocks incoming connections on most ports. We need a firewall rule so your machine can reach PostgreSQL. Just like pg_hba.conf, we will allow access only from your IP address.
| Setting | Value |
|---|---|
| Name | allow-postgres |
| Targets | All instances |
| Source Filter | IP ranges |
| Source IP | YOUR_PUBLIC_IP/32 |
| Protocols/Ports | tcp:5432 |
Click "Create" to save the rule.
Connecting From Your Local Machine
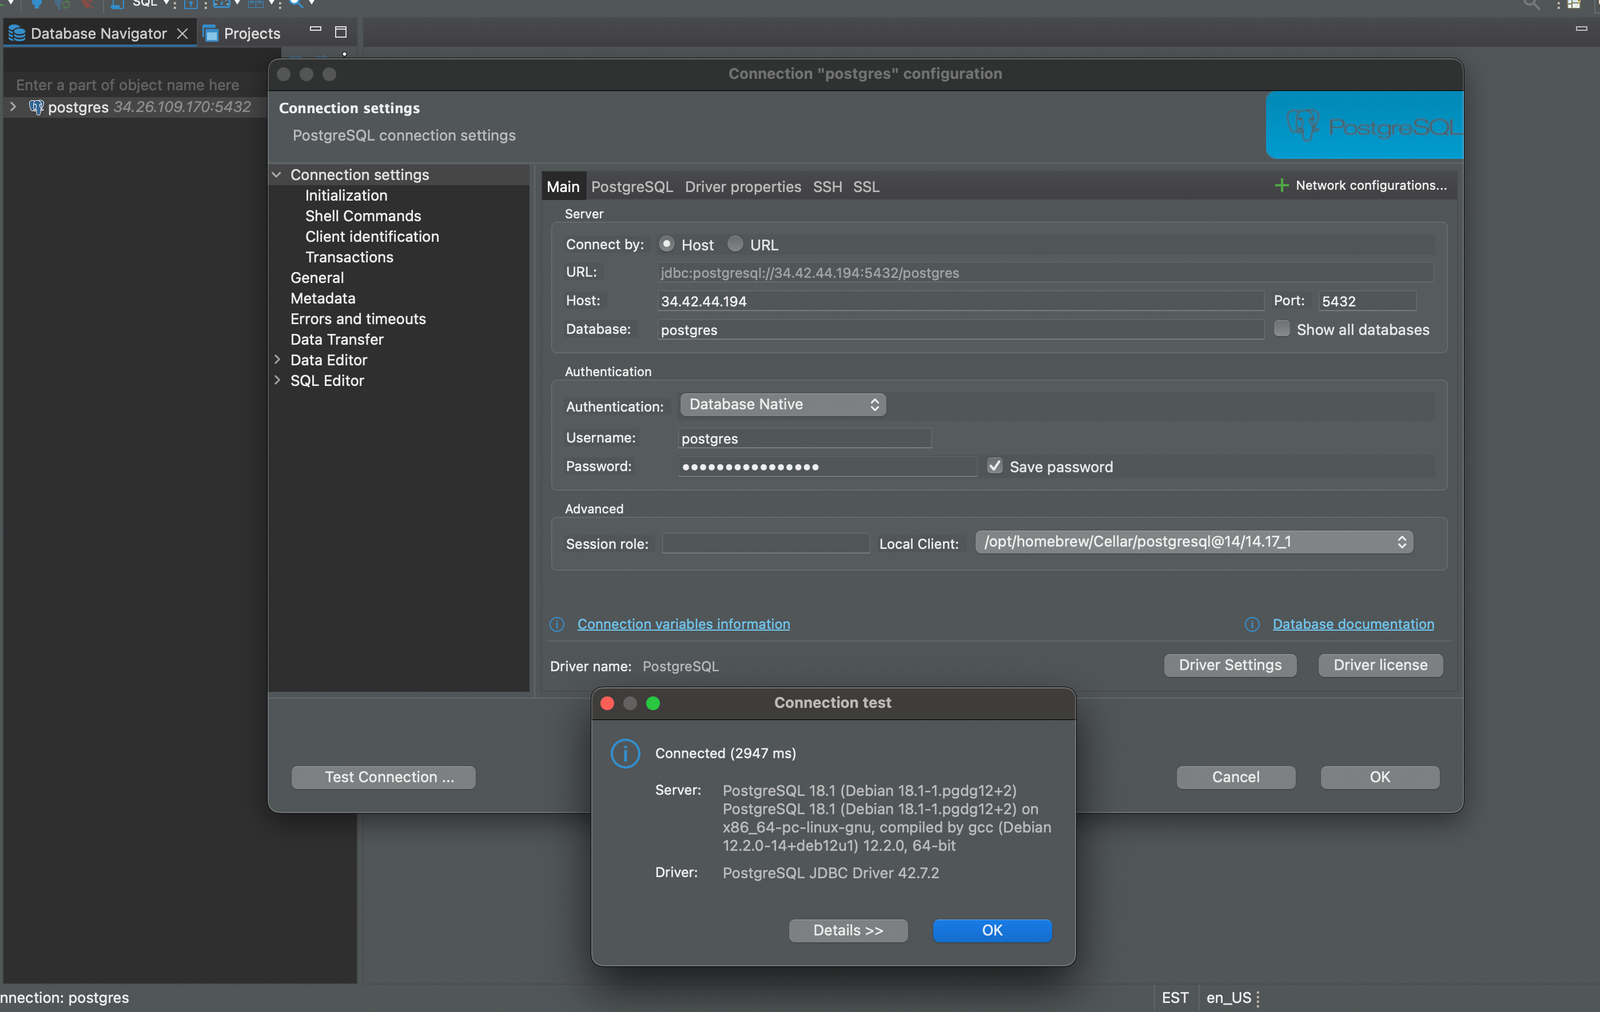
Now you should be able to connect to your PostgreSQL instance from your local machine using a client like DBeaver or pgAdmin.
| Setting | Value |
|---|---|
| Host | YOUR_VM_EXTERNAL_IP |
| Port | 5432 |
| Database | postgres |
| User | postgres |
| Password | mysecretpassword |
And that’s it! You now have a PostgreSQL instance running on a free GCP VM! This setup is perfect for experimenting, learning SQL, hosting small apps, or preparing for more advanced work like backups, replication, Kubernetes, or your future production setup. Security Note: Always restrict access to your database to trusted IPs only. Never expose PostgreSQL to the public internet without firewall rules.